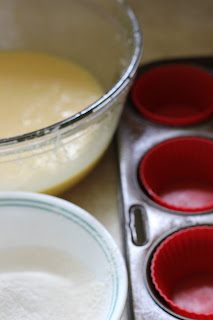
Why hello... It's been a while since we've seen each other. With a new kitchen, I've decided to reignite this food blog. It's actually pretty awesome to be back!
It's #NZWatermelonmonth and to celebrate I've created a
refreshing
sweet'n salty
easy
Watermelon and Feta salad
1/2 watermelon, cut into pieces
1/3 red onion, thinly sliced
50g feta, crumbed
a scattering of sliced almonds
a few wrist flicks of balsamic glaze
lots of salt and pepper
Combine all ingredients together in any way you like.
While researching ideas for this blog, I came across something quite fascinating in Ottolenghi's new book NOPI- pickled watermelon rind! While this recipe isn't the same, you get the idea.
Ginger. Love. Care.
Saturday, 27 February 2016
Monday, 10 June 2013
Just in Time for Winter
Winter will always be the season of soups. They prove to be an easy meal when you have a cold and really don't have the energy to do much more than lie in bed wishing it was over.
The classic soup- pumpkin can be a drag to peel and chop so I went to for a less physical alternative- carrot!
And another good thing about soup is that it is not necessary to chop the vegetables all 'nicely' because in the end it all gets blended up anyway. The important thing is making sure the vegetables are cooked through and soft.
And my goodness, you end up with a sweet, moreish soup. Maybe it was because I used half of the proposed 150g of butter...
The original recipe also contained 1 bouquet garni but who has time to sort that out! For those of you who aren't aware of what this is; sprigs of thyme and parsley, and a bay leaf are tied together with non coloured string which gets placed in the liquid so the flavours diffuse and is then removed at the end. An alternative is to tie up the dried versions of the herbs mentioned in some muslin cloth.
SO do have a try of this simple, budget conscious recipe and let me know what you think!
Curried Carrot Soup
75g butter
Melt the butter in a saucepan and sweat the onion, garlic and carrots until softened.
Meanwhile toast the cumin seeds in a separate saucepan until fragrant. Add the toasted cumin seeds and curry powder to the vegetables and cook a further 2-3 minutes.
Add the chicken stock and 100ml water and bring to the boil. Reduce to a simmer and cook for 30 minutes.
Once the vegetables have cooled down, blend the soup until smooth. Delicious!
The classic soup- pumpkin can be a drag to peel and chop so I went to for a less physical alternative- carrot!
And another good thing about soup is that it is not necessary to chop the vegetables all 'nicely' because in the end it all gets blended up anyway. The important thing is making sure the vegetables are cooked through and soft.
And my goodness, you end up with a sweet, moreish soup. Maybe it was because I used half of the proposed 150g of butter...
The original recipe also contained 1 bouquet garni but who has time to sort that out! For those of you who aren't aware of what this is; sprigs of thyme and parsley, and a bay leaf are tied together with non coloured string which gets placed in the liquid so the flavours diffuse and is then removed at the end. An alternative is to tie up the dried versions of the herbs mentioned in some muslin cloth.
SO do have a try of this simple, budget conscious recipe and let me know what you think!
Curried Carrot Soup
75g butter
1 onion, chopped
2 garlic cloves, crushed
6 carrots, peeled and chopped
1 tsp cumin seeds
½ tsp curry powder
500ml chicken stock
A sprinkle of dried coriander, to serve
Melt the butter in a saucepan and sweat the onion, garlic and carrots until softened.
Meanwhile toast the cumin seeds in a separate saucepan until fragrant. Add the toasted cumin seeds and curry powder to the vegetables and cook a further 2-3 minutes.
Add the chicken stock and 100ml water and bring to the boil. Reduce to a simmer and cook for 30 minutes.
Once the vegetables have cooled down, blend the soup until smooth. Delicious!
Friday, 10 May 2013
Swiss Swiss Everywhere
On a chilling but sunny Saturday morning, we ventured out to the 4th annual Swiss market at the Danish House in Penrose. There was a light, family environment with many people experiencing all that is Swiss. The food on offer included Spätzle (a type of egg pasta) with caramelised onion and cheese,and an assortment of traditional breads and pastries. We picked up a classic pretzel and a hazelnut pastry- both delicious with the pretzel a bit on the smaller side.
Also available were Swiss food products which you can not easily find in New Zealand supermarkets, like Fondue mix and Rosti mix- how Swiss! The best and most affordable knifes in the world (Victorinox!) were even there. I got a packet of three small ones a few years back in Switzerland and they are still going strong- even after being in the destructiveness of the dishwasher.
It is wonderful to see such events in Auckland to give you an insight into another culture which might not be so apparent in everyday life. I say 'keep it up!' to the organisers of this small and popular market.
Spätzle making in progress |
Also available were Swiss food products which you can not easily find in New Zealand supermarkets, like Fondue mix and Rosti mix- how Swiss! The best and most affordable knifes in the world (Victorinox!) were even there. I got a packet of three small ones a few years back in Switzerland and they are still going strong- even after being in the destructiveness of the dishwasher.
It is wonderful to see such events in Auckland to give you an insight into another culture which might not be so apparent in everyday life. I say 'keep it up!' to the organisers of this small and popular market.
Monday, 25 March 2013
A new discovery
So it's been a while since my last post- a pretty awful long time. Moving to a new city and studying again can do that to you. My new city you ask? Is Auckland... a city which I am really excited about. There is so much on offer here. Including the French Farmers Market at La Cigale, Parnell. On Sunday I picked up some figs! Something you'd rarely see in the colder Christchurch climate. With contemplation about what I'd make..
A fig and almond tart it was, courtesy of Donna Hay.
I left them on the counter for a day... bad move! Make sure to store them in the fridge.
Makes 2
1 block store-bought puff pastry, thawed and halved
75g butter, melted
1/3 cup caster sugar
2 eggs, lightly beaten
1 cup ground almonds
1/2 cup plain flour, sifted
7 figs, quartered
1/3 cup caster sugar, extra
Preheat oven to 200C.
Roll out pastry halves into long rectangles. Place on baking tray lined with non-stick baking paper or silicone parchment.
Using a small, sharp knife score a 1cm border around each sheet.
Place the butter, sugar, eggs, ground almonds and flour in a bowl and mix well to combine.
Spread half the mixture over each pastry sheet.
Place the figs and extra sugar in a bowl and toss gently to coat.
Top the pastry with the figs and bake for 20-25 minutes or until puffed and golden.
Saturday, 22 December 2012
Say 'Merry Christmas' with Lebkuchen
Christmas provides a wonderful excuse to make delicious sweet treats to share with family and friends. Fruit mince pies, pavlovas, cream filled brandy snaps are some of the more traditional New Zealand offerings. BUT this year I wanted to try something different.
Lebkuchen are dark, spicy heart shaped cookies that are found throughout Germany. You'll usually see them hung from a ribbon with phrases such as 'Ich liebe dich' (I love you) and 'Frohe Weihnachten' (Merry Christmas) written on them with icing.
This particular recipe comes from Marian Keyes' recipe book Saved by Cake (my new favourite!), so while not traditionally German, it produces something to convert you all the same.
And this is a prime opportunity to wish you all a Merry Christmas!
100g butter
275g honey
100g light brown sugar
1 teaspoon ground ginger
1 teaspoon ground coriander
1 teaspoon ground cinnamon
1 teaspoon ground allspice
0.5 teaspoon ground nutmeg
2 cloves, bashed
1 star anise
6 cardamom pods, bashed
2.5 tablespoons cocoa powder
600g plain flour (I used a little less than 600g of flour and still the mixture was too dry. I'd recommend a lot less flour- maybe 500g?)
pinch of salt
1.5 teaspoons baking powder
1 egg
In a saucepan, heat the butter, honey sugar, spices and cocoa powder gently until the butter has melted and the sugar has dissolved. Be careful not to let it burn.
Take it off the heat and allow to cool. Remove the cloves, cardamom pods and star anise.
In a large mixing bowl, sift the flour and baking powder and stir together with the salt. Make a well in the center and pour in first the egg, then the butter-spice mix. Mix together on low speed with until it comes together in a ball.
Divide roughly into 2 balls and wrap each in glad wrap and place in the fridge. Let them sit for at least a couple of hours, or even up to 2 days.
When you’re ready, line 4 baking trays and pre-heat the oven to 180C. Flour your bench and roll the dough out to about 1.5cm thick. The cooled mixture actually ended up being too hard so I put it in the microwave for 30 seconds or so- depending on the amount of dough.
Press your heart shaped cookie cutter down into the rolled out dough and wiggle to loosen. Carefully left off the bench (use a palette knife if you have one) and place on the baking trays.
Make a small hole in the corner of the hearts with a drinking straw if you wish to thread a ribbon through them to hang as decorations.
Once all the hearts are cut, bake for 15 to 20 minutes. Do watch that they don’t catch on the bottom (they will burn from the underneath first- the heart tip will colour to let you know).
Let the cookies cool completely on the trays- they will harden. Then decorate as you wish. I used an icing sugar, water, colouring mixture and used an icing pen.
(L) 1st attempt (R) 2nd successful attempt |
Saturday, 24 November 2012
Chronicles of Europe: Spain
Barcelona
Barcelona is an amazing hub of constant bars,cafes and restaurants. I didn't stray much past La Ramblas but within those streets were delicious morsels- even if you can't hide from the tourists.
To sample the ones to the right, visit Sagardi near La Ramblas. A busy and well priced joint, floating with international visitors.
An extremely popular and simple tapas bar was Can Paixano, located not far from Barcelona's water front. It was packed, hot and sweaty but the cava cooled you down and the Iberian ham rolls kept your tummy satisfied.
I was lucky enough to participate in a cooking class and market tour with Cook and Taste, an extremely well thought out and tidy space. Our teacher took his art seriously, but with a laugh. The day just flew by- we drank, we talked, we cooked and of course we ate!
First was the tour of La Boqueria market off La Ramblas, housing many Catalonian culinary delights, to purchase the fresh produce for the class. We saw exotic fruits, an abundance of seafood including salted cod, wild mushrooms and a variety of Iberian hams.
Next up was the cooking class. A mixture of Australians, Americans, an English couple and the one New Zealander worked together to create a variety of dishes true to the Spanish cuisine. If any of these dishes appeal to you, I can email you the recipe (contact ginger.love.care@gmail.com).
On the menu was:
Pan con Tomate (Tomato bread)
Served with a hard, sharp cheese and Iberian ham (which is amazing- the best ham in the world!)
Anchoas a la Plancha con Melón y Vinagreta Suave de Aceitunas Verdes y Pepinillos (Griddled anchovies with melon and a light green olive and gherkin vinaigrette)
The melon is marinated in sweet dessert wine and lemon juice. Sounds like an "interesting" mix, but the flavours work so well together. My favourite dish of the day.
Sopa de Pimiento Rojo al Aroma de Azafrán Tostado con Atún (Red bell pepper soup, flavoured with toasted saffron and griddled tuna)
The peppers were gently roasted and the saffron toasted in foil over an element- bringing out the best in both of these ingredients.
Clam Escabeche (Clams in a acidic fish broth)
The broth was made using bits of seafood left to boil and infuse. This dish really makes the most of the seafood available in Barcelona.
Paella de Marisco (Seafood paella)
A classic. The best rice to use is a strachy and round- sushi rice in fact! Also suggested was not to stir the rice as it cooks, to make the most of the starch content.
Crema Catalana (Catalan cream)
Créme brulée's cousin... quite simply- creamy and crunchy!
Seville
This city holds a vibrant mixture of flamenco, mosaics and food.
There is definitely a love affair with pastries going on in Spain. My favouite in Seville was located behind Plaza de Toros: Los Angeles Confireria y Pasteleria. There was so much to choose from, in fact I went back three times!
In this picture is a polvorón (a Spanish type of shortbread). It is an ode to my Mother who taught me so much about the Spanish cuisine.
Of course, it is mandatory to recommend a tapas bar. I enjoyed Taberna el Papelón, on Seville's main tourist street. With that comes tourist prices, but an exciting and busy vibe to it. I ordered a refreshing sangria and Jambon focaccia- a classic dinner bite. Plus you got a free bag of little baguette shaped crackers. Score!
When I was stuck for what other foodie discoveries were in Seville, off to the internet I went. I came across La Fiorentina, an artisan ice creamery recommended by The Guardian. It has an unbelievable variety of original flavours- the best I've ever seen!
Madrid
Spain's capital city has many treasures- unfortunately I didn't discover many of these as it was constantly raining during my visit. Consequently I left my camera at the hotel (wasn't bidding on the success of my water lodged camera insurance claim), so I have no record of my foodie adventures. You will just have to take my word for it.
The tapas are world renowned in Madrid, with famous streets being Calle del Almendro and Calle Cava Baja. A Basque pintxos bar in the area is Taberna Txacolina, a very popular destination with a delicious display. I highly recommend trying the caramelised goat's cheese, and the jamon, brie and jam combination- both served on toasted baguette. It is also customary to try some txakoli (a traditional sparkling wine).
Later on that night (restaurants, bars etc. open around 8pm and close in the early hours of the morning- the Spanish way of life), we visited the must-see Mercado de San Miguel. Absolutely amazing! Grab a sangria and have a wonder, you can spend hours in this place sampling all that's on display.
I was also hoping to do a Tapas Experience tour with New Madrid, but it was called off due to the rain. If you try it one day- let me know what it's like!
As you can see, there is much to say about the Spanish way of life and cuisine. Really, one blog post does it no justice- you have to experience it for yourself. I hope this has given you a starting point for ideas. I would love to hear from those who have been, so I make notes for my next trip!
Keep a look out for my next post- Chronicles of Europe: France.
Barcelona is an amazing hub of constant bars,cafes and restaurants. I didn't stray much past La Ramblas but within those streets were delicious morsels- even if you can't hide from the tourists.
To sample the ones to the right, visit Sagardi near La Ramblas. A busy and well priced joint, floating with international visitors.
An extremely popular and simple tapas bar was Can Paixano, located not far from Barcelona's water front. It was packed, hot and sweaty but the cava cooled you down and the Iberian ham rolls kept your tummy satisfied.
I was lucky enough to participate in a cooking class and market tour with Cook and Taste, an extremely well thought out and tidy space. Our teacher took his art seriously, but with a laugh. The day just flew by- we drank, we talked, we cooked and of course we ate!
First was the tour of La Boqueria market off La Ramblas, housing many Catalonian culinary delights, to purchase the fresh produce for the class. We saw exotic fruits, an abundance of seafood including salted cod, wild mushrooms and a variety of Iberian hams.
On the menu was:
Pan con Tomate (Tomato bread)
Served with a hard, sharp cheese and Iberian ham (which is amazing- the best ham in the world!)
Anchoas a la Plancha con Melón y Vinagreta Suave de Aceitunas Verdes y Pepinillos (Griddled anchovies with melon and a light green olive and gherkin vinaigrette)
The melon is marinated in sweet dessert wine and lemon juice. Sounds like an "interesting" mix, but the flavours work so well together. My favourite dish of the day.
Sopa de Pimiento Rojo al Aroma de Azafrán Tostado con Atún (Red bell pepper soup, flavoured with toasted saffron and griddled tuna)
The peppers were gently roasted and the saffron toasted in foil over an element- bringing out the best in both of these ingredients.
Clam Escabeche (Clams in a acidic fish broth)
The broth was made using bits of seafood left to boil and infuse. This dish really makes the most of the seafood available in Barcelona.
Paella de Marisco (Seafood paella)
A classic. The best rice to use is a strachy and round- sushi rice in fact! Also suggested was not to stir the rice as it cooks, to make the most of the starch content.
Crema Catalana (Catalan cream)
Créme brulée's cousin... quite simply- creamy and crunchy!
Seville
This city holds a vibrant mixture of flamenco, mosaics and food.
There is definitely a love affair with pastries going on in Spain. My favouite in Seville was located behind Plaza de Toros: Los Angeles Confireria y Pasteleria. There was so much to choose from, in fact I went back three times!
In this picture is a polvorón (a Spanish type of shortbread). It is an ode to my Mother who taught me so much about the Spanish cuisine.
Of course, it is mandatory to recommend a tapas bar. I enjoyed Taberna el Papelón, on Seville's main tourist street. With that comes tourist prices, but an exciting and busy vibe to it. I ordered a refreshing sangria and Jambon focaccia- a classic dinner bite. Plus you got a free bag of little baguette shaped crackers. Score!
When I was stuck for what other foodie discoveries were in Seville, off to the internet I went. I came across La Fiorentina, an artisan ice creamery recommended by The Guardian. It has an unbelievable variety of original flavours- the best I've ever seen!
Madrid
Spain's capital city has many treasures- unfortunately I didn't discover many of these as it was constantly raining during my visit. Consequently I left my camera at the hotel (wasn't bidding on the success of my water lodged camera insurance claim), so I have no record of my foodie adventures. You will just have to take my word for it.
The tapas are world renowned in Madrid, with famous streets being Calle del Almendro and Calle Cava Baja. A Basque pintxos bar in the area is Taberna Txacolina, a very popular destination with a delicious display. I highly recommend trying the caramelised goat's cheese, and the jamon, brie and jam combination- both served on toasted baguette. It is also customary to try some txakoli (a traditional sparkling wine).
Later on that night (restaurants, bars etc. open around 8pm and close in the early hours of the morning- the Spanish way of life), we visited the must-see Mercado de San Miguel. Absolutely amazing! Grab a sangria and have a wonder, you can spend hours in this place sampling all that's on display.
I was also hoping to do a Tapas Experience tour with New Madrid, but it was called off due to the rain. If you try it one day- let me know what it's like!
As you can see, there is much to say about the Spanish way of life and cuisine. Really, one blog post does it no justice- you have to experience it for yourself. I hope this has given you a starting point for ideas. I would love to hear from those who have been, so I make notes for my next trip!
Keep a look out for my next post- Chronicles of Europe: France.
Monday, 19 November 2012
Marian's White Choco Cupcakes with Salted Caramel Icing
Marian Keyes' venture into cookbook writing was a wise move! The recipes contained in Saved By Cake are varied and interesting, and the advice accompanying each one is simply helpful. What caught my eye were the Wasabi and White Chocolate Cupcakes with Salted Caramel Icing- doesn't this strange combination sound delicious! Unfortunately, having no wasabi in the house, meant my version lacked the essential flavour. BUT I (and Marian) highly recommend you try it, as I will for my next round.
Don't forget to check out the blog's Facebook page: Ginger. Love. Care.
White Chocolate Cupcakes with Salted Caramel Icing
For the cupcakes:
100g white chocolate
100g butter, chilled and cut into cubes
110g caster sugar
1 teaspoon vanilla extract
3 eggs
75g plain flour
1 teaspoon baking powder
pinch of salt
For the icing:
100g butter
75g light brown soft sugar
75g golden syrup
1 teaspoon vanilla extract
1 teaspoon coarse sea salt
Preheat oven to 180C and line 12 hole cupcake tray.
Melt the chocolate in a heatproof bowl over a pot of boiling water (double boiler method). Be sure to heat up slowly as white chocolate has the tendency to burn.
Add the butter to the bowl and stir until melted.
Remove from the heat and stir in the sugar. It will look clumpy at this stage but do not be worried.
Let the mixture cool for 10 minutes then stir in the vanilla essence.
Beat in an egg at a time with an electric mixer until each one is well combined.
Double sift the dry ingredients. (I actually triple sifted as Marian recommends to get as much air in there as possible). Gently fold into the wet mixture. It will look very liquid at this stage. I was a bit concerned but they still turned out well!
Divide mixture among cupcake tray. Bake for 20 minutes. Mine were in there for 22 minutes. Result: slightly browned cupcakes.
To make the icing, place all ingredients into a saucepan and melt over a low heat. When butter and sugar have melted, raise the heat. Whisk briskly until mixture starts to bubble, but do not let it boil. Keep it at this point for 5 to 8 minutes, until it thickens. Be careful as it will be very hot!!!
When the mixture has cooled down but is still liquid, spread over the cupcakes. The mixture I produced as quite runny so take this step slowly so it doesn't all spill down the sides.
Once iced, sprinkle with a little coarse sea salt- and voila! The soft sweet cupcake goes so well with the salty toffee. And feel free to adjust amount of salt in the icing depending on your taste.
Don't forget to check out the blog's Facebook page: Ginger. Love. Care.
White Chocolate Cupcakes with Salted Caramel Icing
100g white chocolate
100g butter, chilled and cut into cubes
110g caster sugar
1 teaspoon vanilla extract
3 eggs
75g plain flour
1 teaspoon baking powder
pinch of salt
For the icing:
100g butter
75g light brown soft sugar
75g golden syrup
1 teaspoon vanilla extract
1 teaspoon coarse sea salt
Preheat oven to 180C and line 12 hole cupcake tray.
Melt the chocolate in a heatproof bowl over a pot of boiling water (double boiler method). Be sure to heat up slowly as white chocolate has the tendency to burn.
Add the butter to the bowl and stir until melted.
Remove from the heat and stir in the sugar. It will look clumpy at this stage but do not be worried.
Let the mixture cool for 10 minutes then stir in the vanilla essence.
Beat in an egg at a time with an electric mixer until each one is well combined.
Double sift the dry ingredients. (I actually triple sifted as Marian recommends to get as much air in there as possible). Gently fold into the wet mixture. It will look very liquid at this stage. I was a bit concerned but they still turned out well!
Divide mixture among cupcake tray. Bake for 20 minutes. Mine were in there for 22 minutes. Result: slightly browned cupcakes.
To make the icing, place all ingredients into a saucepan and melt over a low heat. When butter and sugar have melted, raise the heat. Whisk briskly until mixture starts to bubble, but do not let it boil. Keep it at this point for 5 to 8 minutes, until it thickens. Be careful as it will be very hot!!!
When the mixture has cooled down but is still liquid, spread over the cupcakes. The mixture I produced as quite runny so take this step slowly so it doesn't all spill down the sides.
Once iced, sprinkle with a little coarse sea salt- and voila! The soft sweet cupcake goes so well with the salty toffee. And feel free to adjust amount of salt in the icing depending on your taste.
How do these compare to the original? |
Subscribe to:
Posts (Atom)